Welcome to an exciting exploration of a new feature in RSS Masher that allows you to integrate sitemaps directly into your mash. This feature is particularly useful for anyone looking to refresh older content on their WordPress sites. Let’s dive into how to effectively use this feature to rewrite and update your older articles, ensuring they get the attention they deserve from search engines.
Understanding the Feature
Before we get into the nitty-gritty of implementation, it's crucial to understand the prerequisites. You must own the WordPress site from which the sitemap originates. This is because we utilize a clever API call that leverages your credentials to communicate with your WordPress site to pull articles down.
The primary reason for this feature's development is to help users rewrite older content that may not be receiving visibility anymore. For instance, if you have a WordPress site that has been active for about twelve months, you might notice that articles posted six to eight months ago are not getting the attention they once did. With this feature, you can retrieve those articles, rewrite and update them, and then republish them. This refreshes the content and prompts search engines to reindex it.
Getting Started with Sitemaps
To get started, you first need to obtain a sitemap from your WordPress site. Assuming you've already integrated your WordPress site into your RSS Masher account with the necessary credentials, the next steps are straightforward.
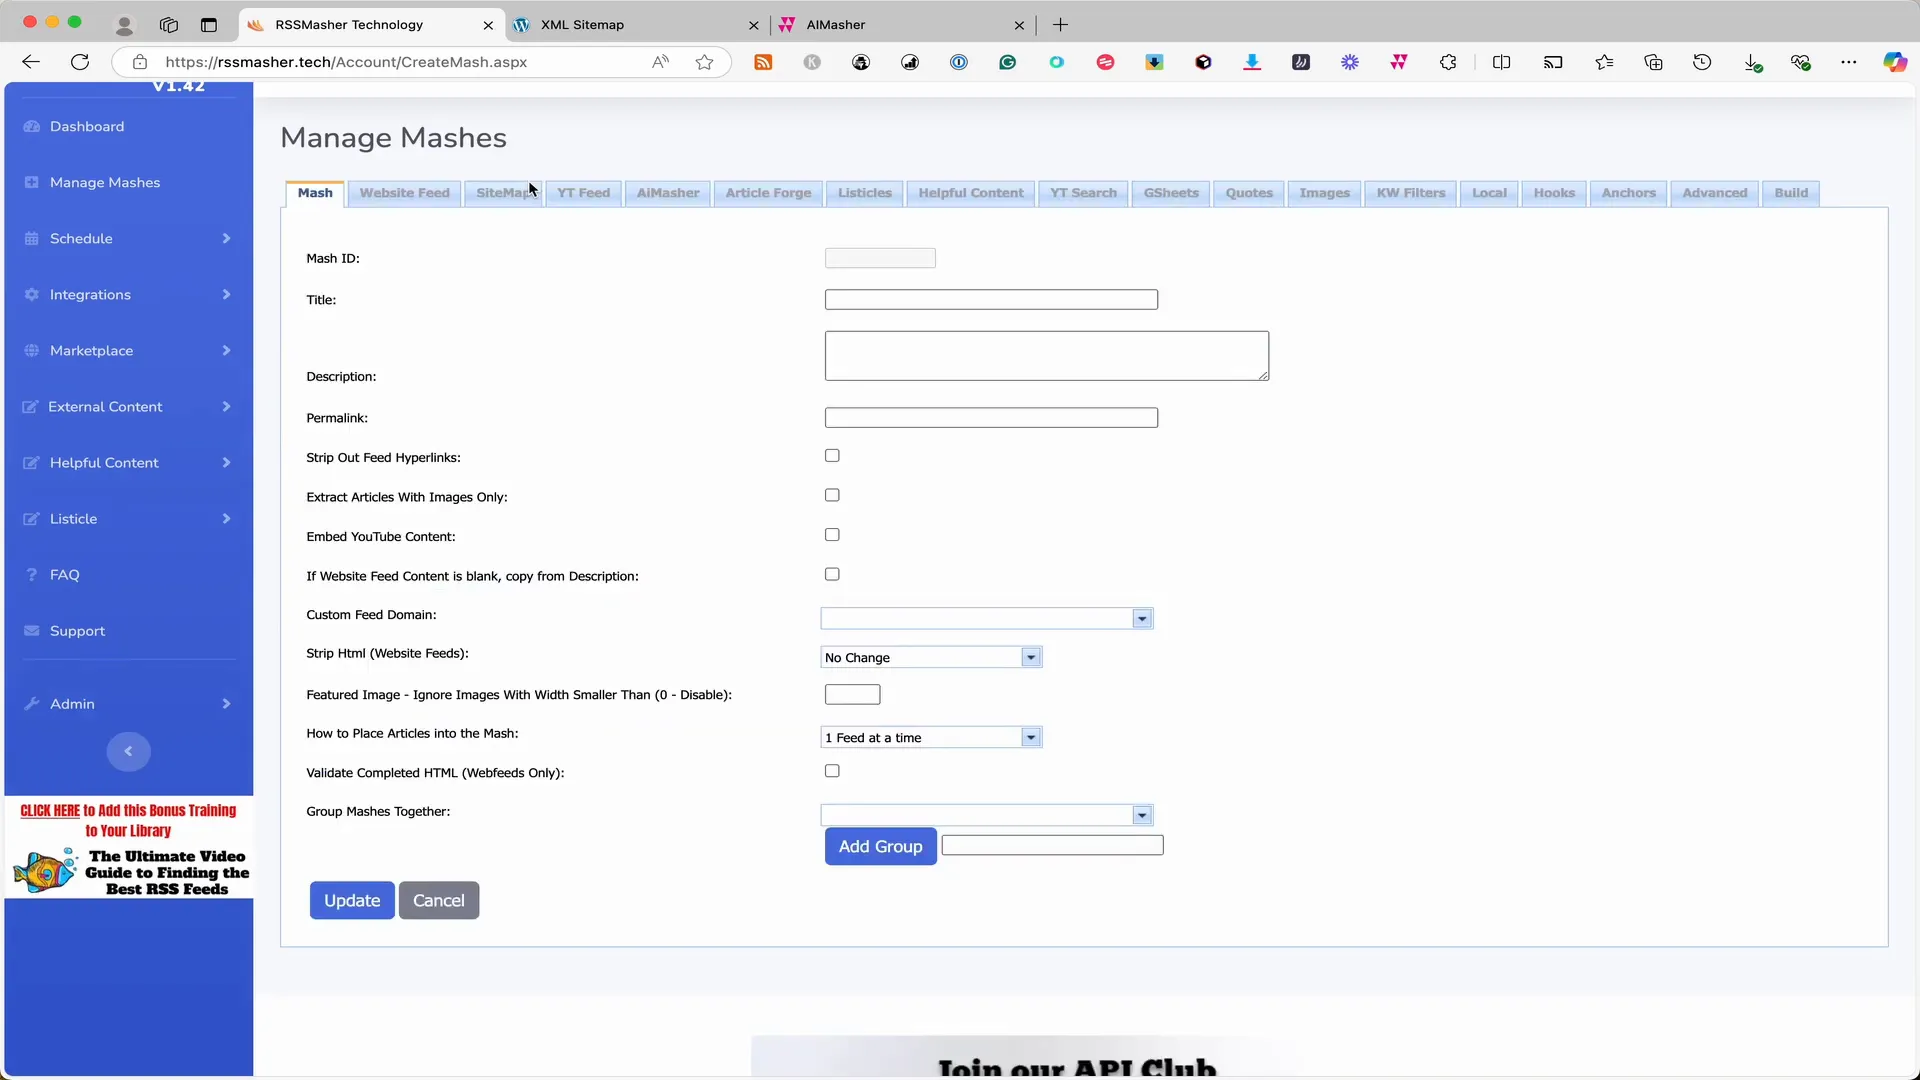
Navigate to the "Manage Mashes" section and click on "Add". For this example, let’s title the mash "Rewrite Sitemap". We can skip the checkboxes and go straight to updating.
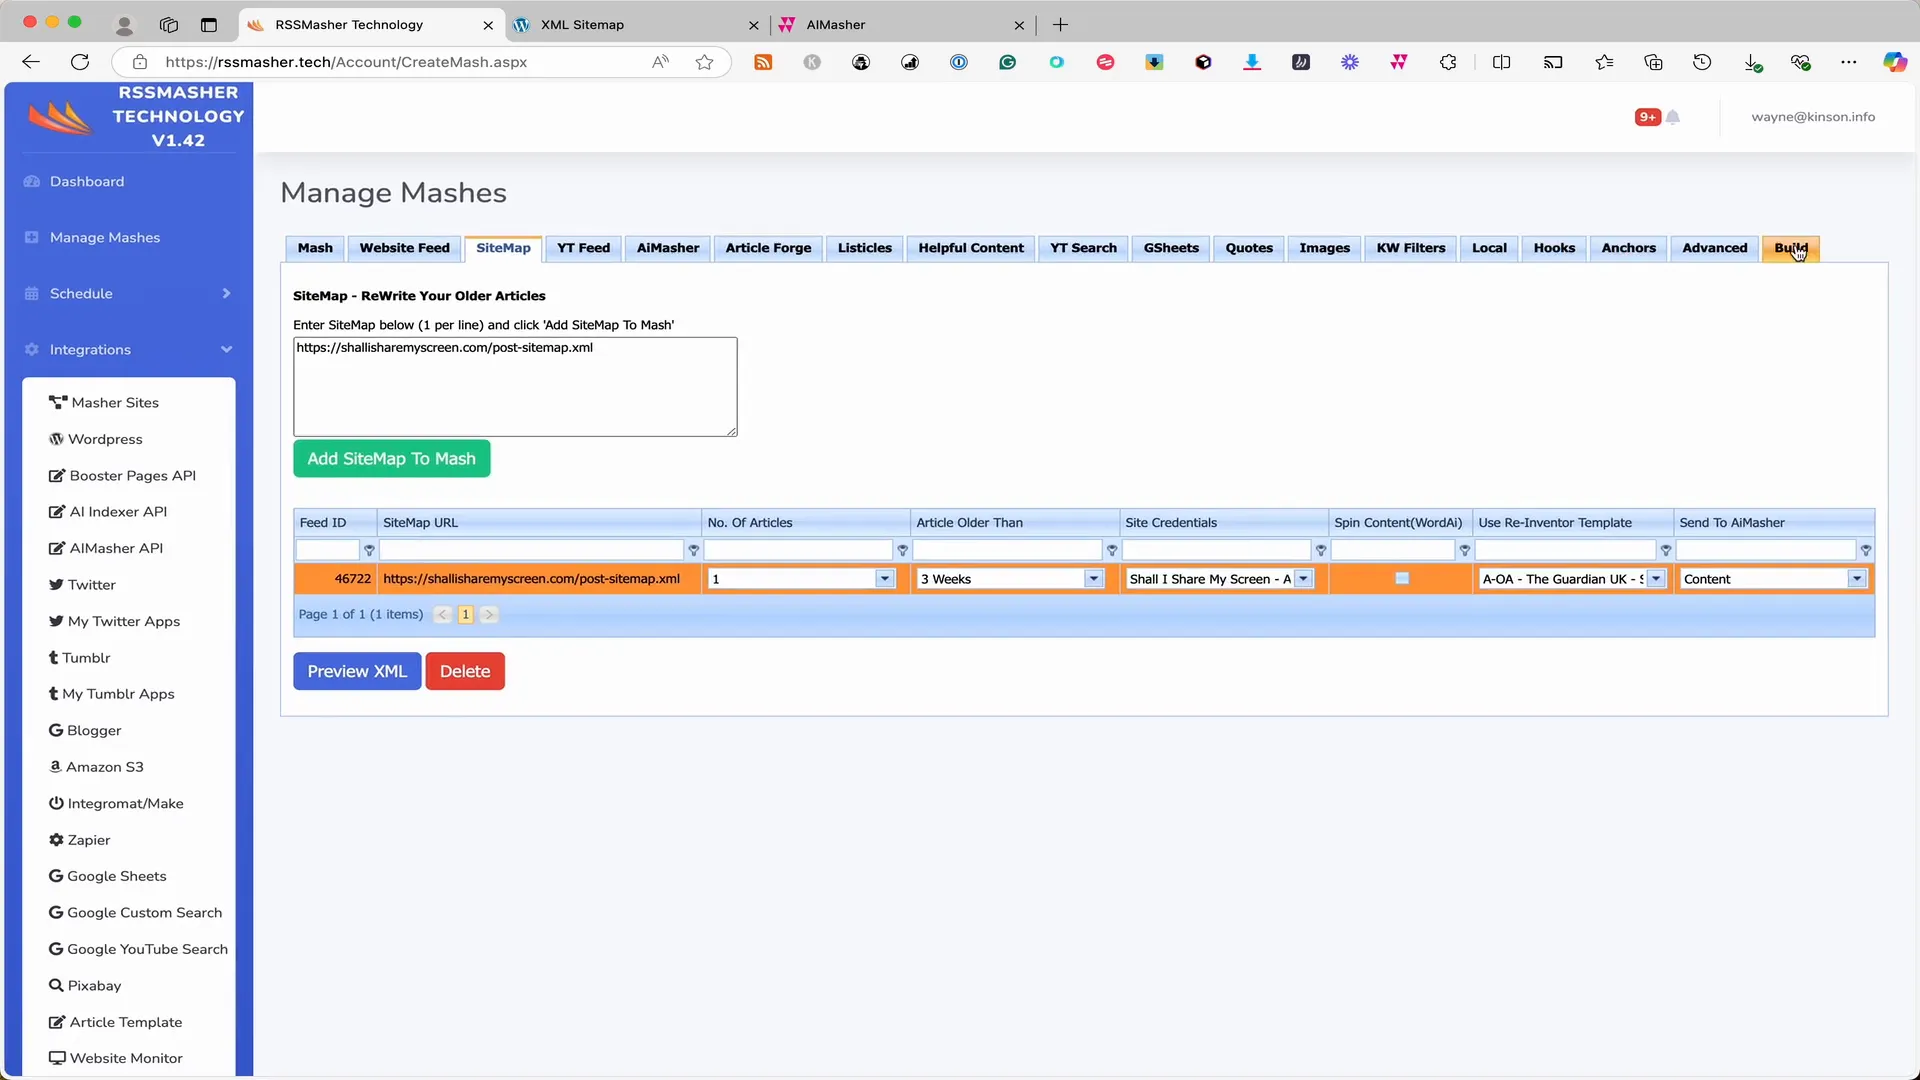
You will notice a new tab labeled "Sitemap". This allows you to create a mash that includes sitemaps alongside other content types. Now, you need to input your sitemap into the provided box.
Accessing Your Sitemap
To find your sitemap, go to your WordPress site. If you're using a plugin like Yoast, you can typically access the sitemap by navigating to sitemap.xml. This will take you back to the index of the sitemap, displaying various sitemaps.
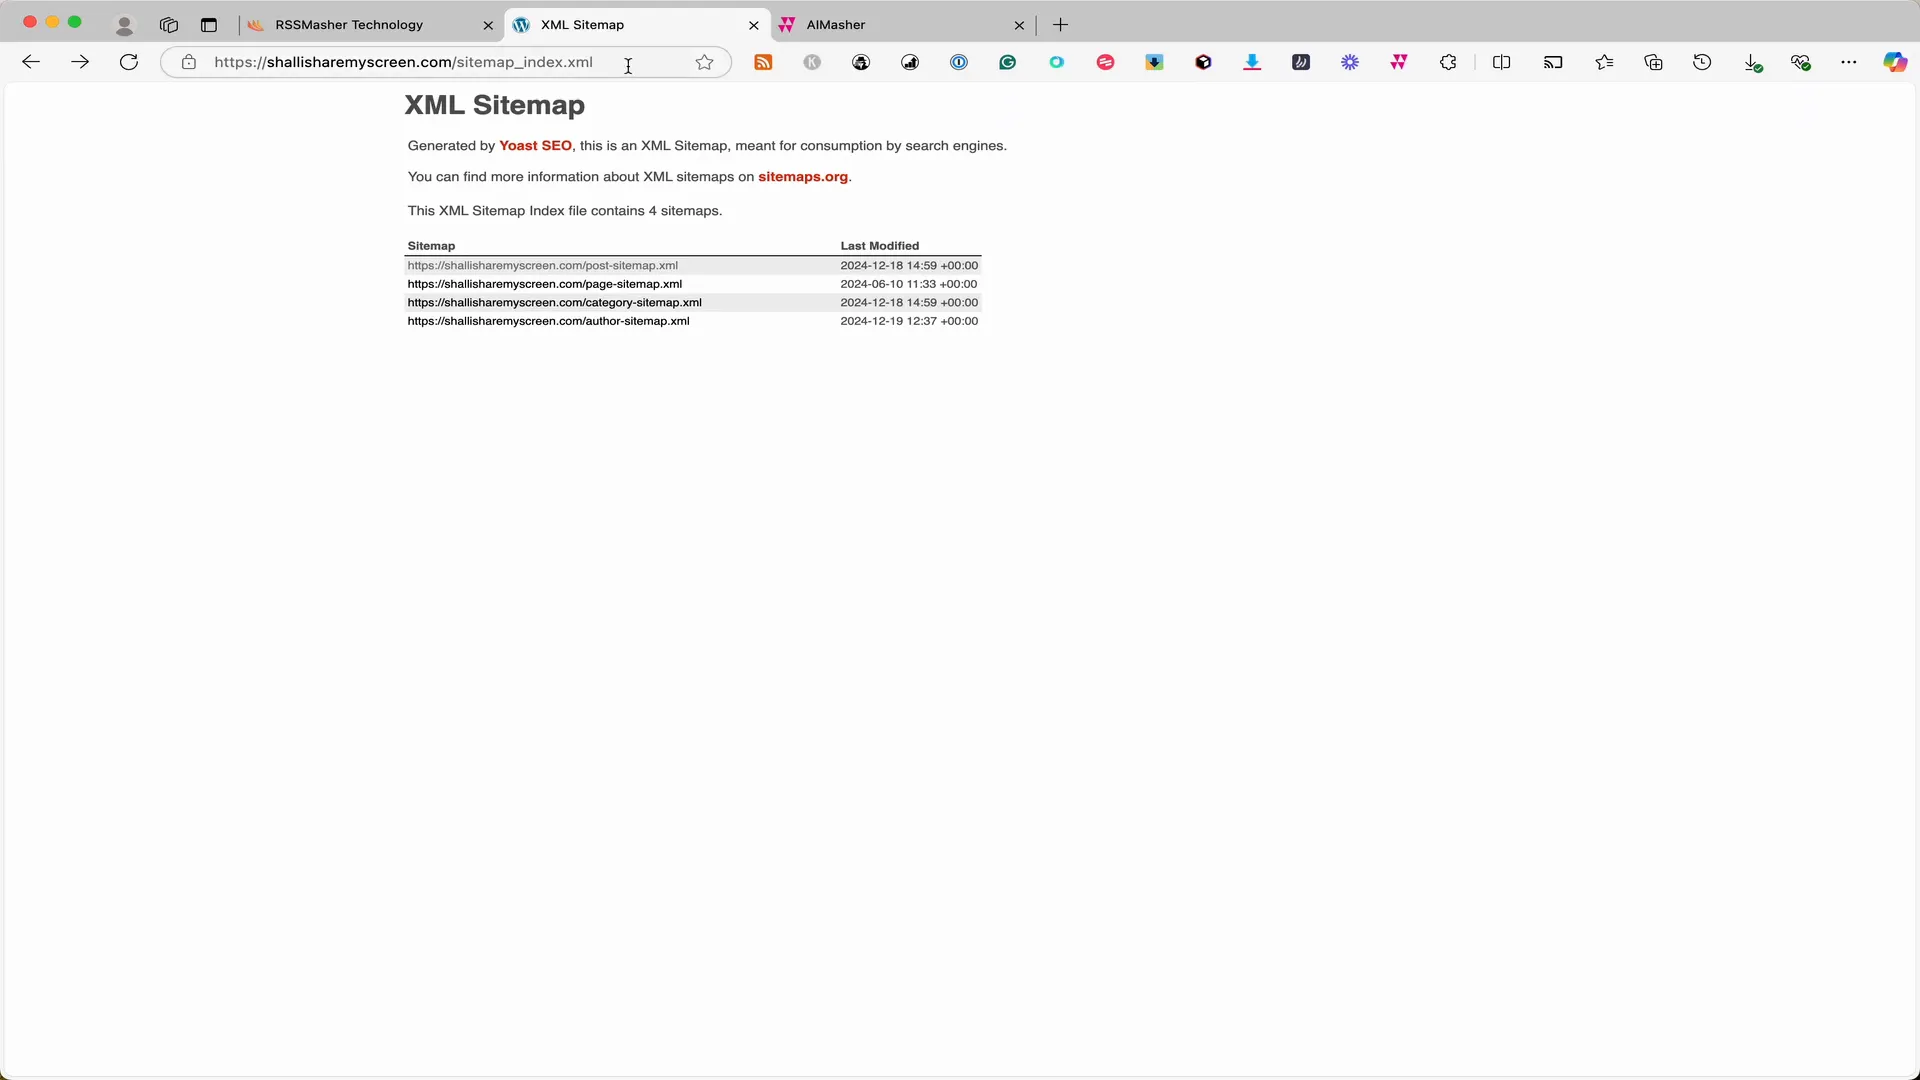
The specific sitemap you want is the "Post Sitemap." Clicking on it will reveal the articles referenced inside. Copy the URL of the post sitemap and return to RSS Masher to paste it into the designated box. Click "Add Sitemap to Mash", and it will appear in the bottom box.
Defining Article Criteria
Now that you have your sitemap added, you can set parameters for how many articles you want to extract, whether it's 1, 5, 10, etc. For this demonstration, let’s select one article. Next, you will specify the age of the articles you want to pull. You can choose articles that are older than a week up to six months. For this example, let’s select articles that are three weeks old or older.
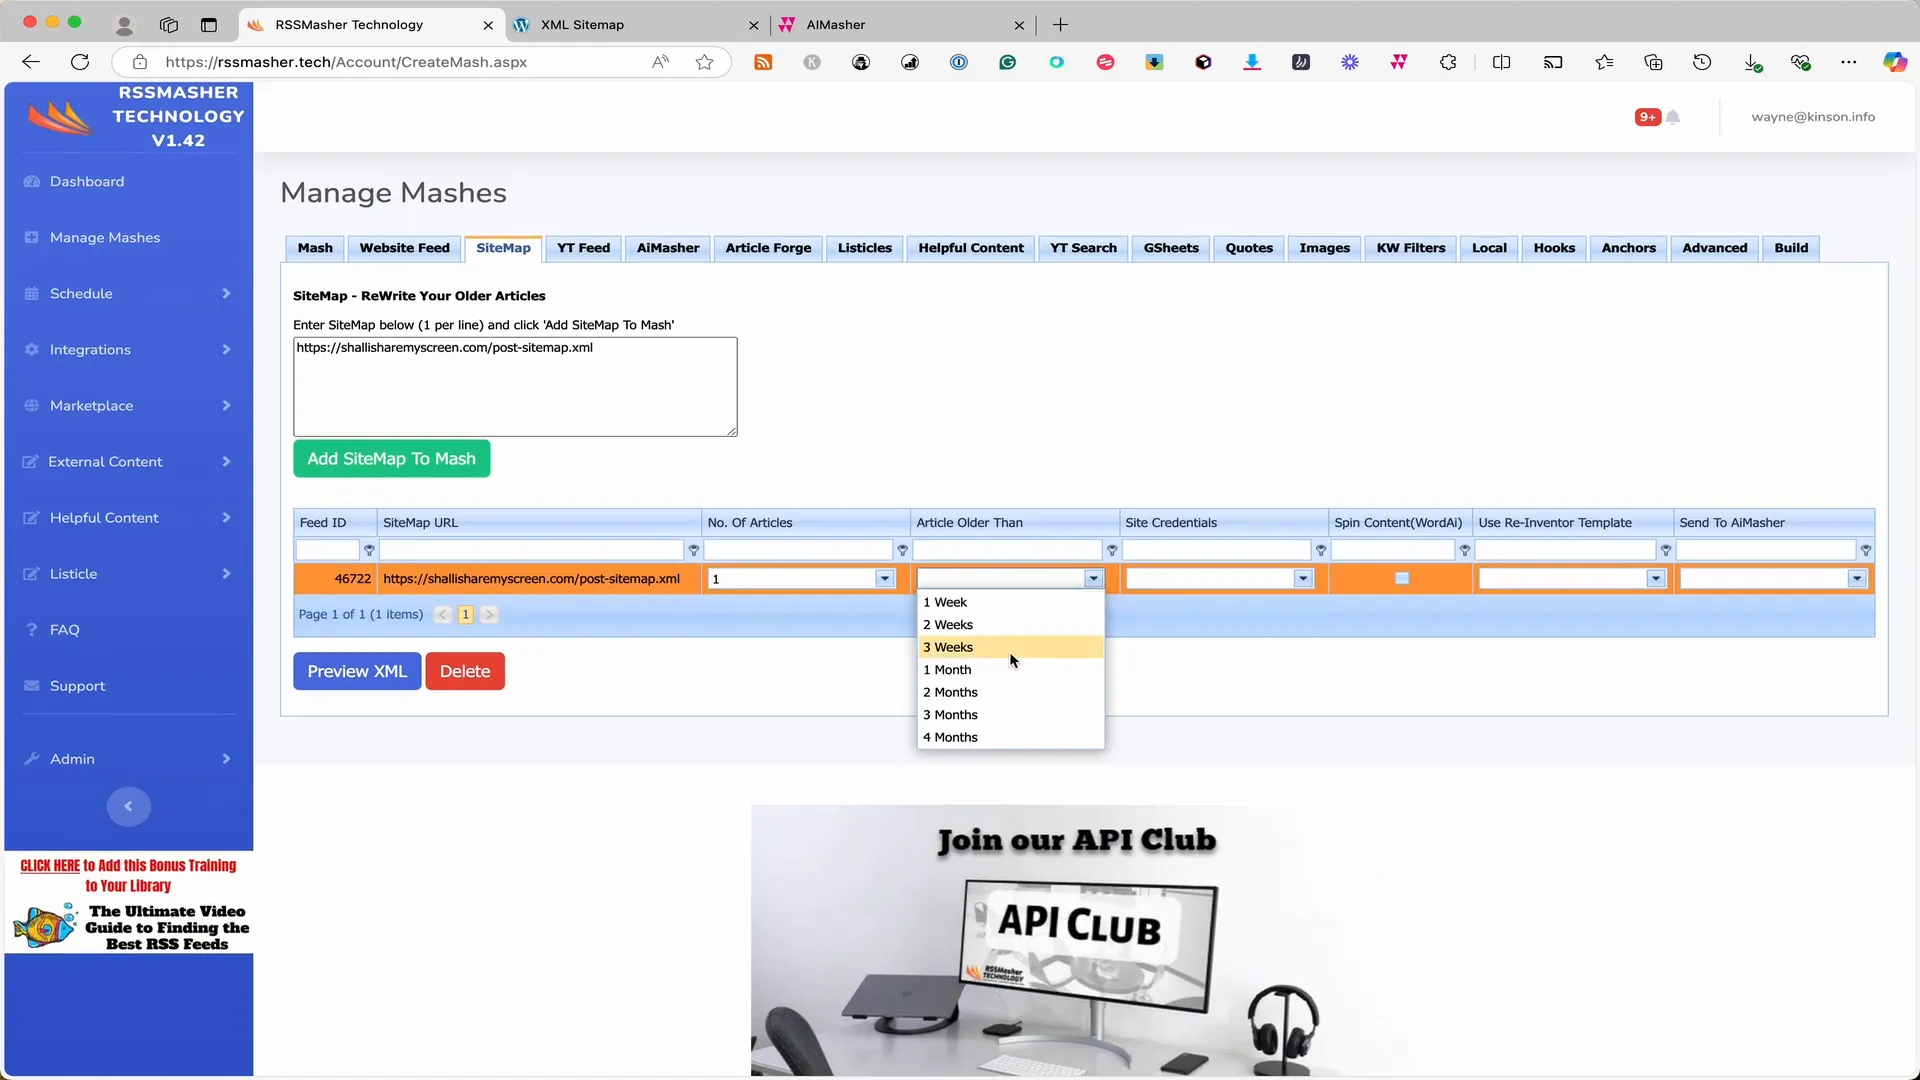
After that, select the site credentials that correspond to your WordPress. If you select the incorrect one, you will see an error indicating the domain does not match the sitemap. Ensure you select the correct one for a seamless experience.
Choosing a Reinvent Template
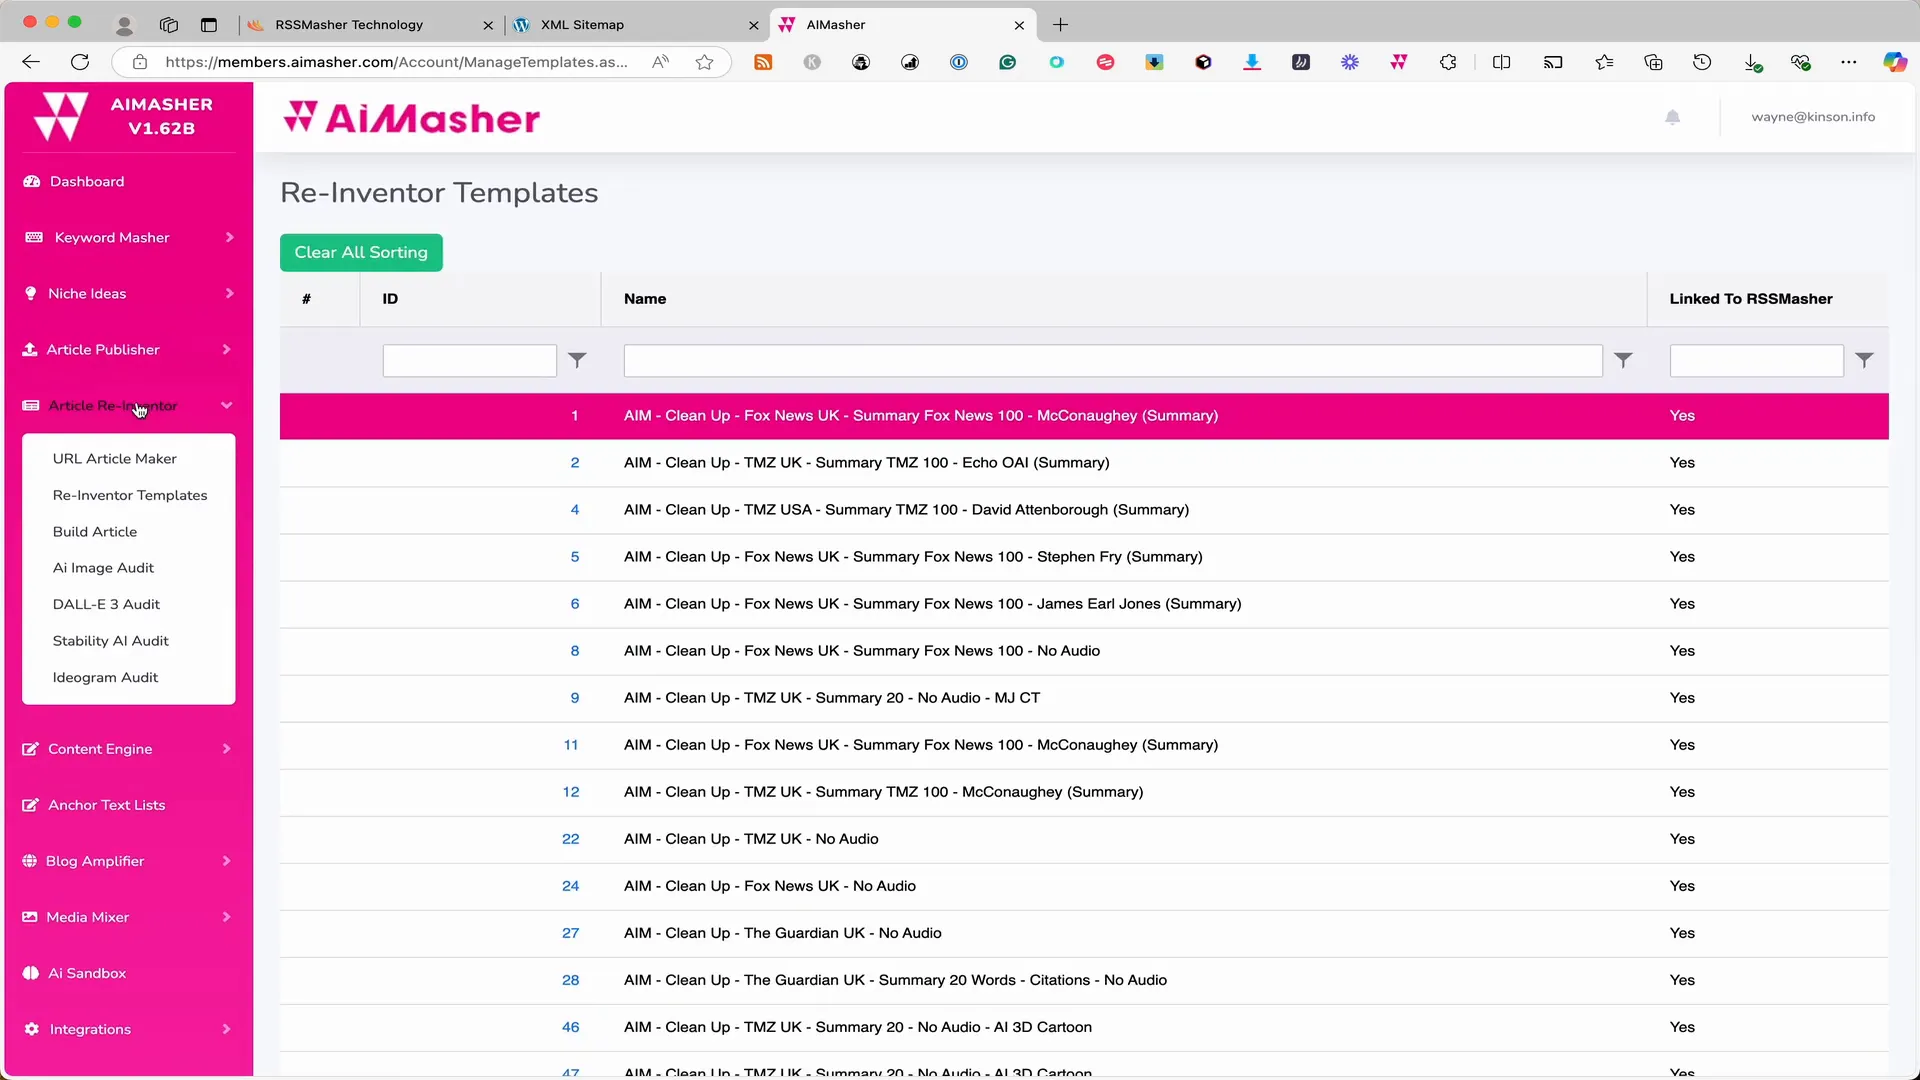
The next step involves choosing a reinvent template. To do this, navigate to AI Maser and select the "Reinvent" menu, followed by "Reinvent Templates". Here, you can create templates that will be used in RSS Masher.
In your template, specify your API keys, and set the temperature. A temperature of 6 is a good starting point. If you’re unsure what the temperature means, you can find an explanation by clicking the appropriate link.
When setting up your template, avoid common words that AI tends to favor. You can tick the box to avoid these. Since we're working with sitemaps, we won’t need a cleanup prompt as sitemaps typically contain clean articles.
Setting Up Rewrite Prompts
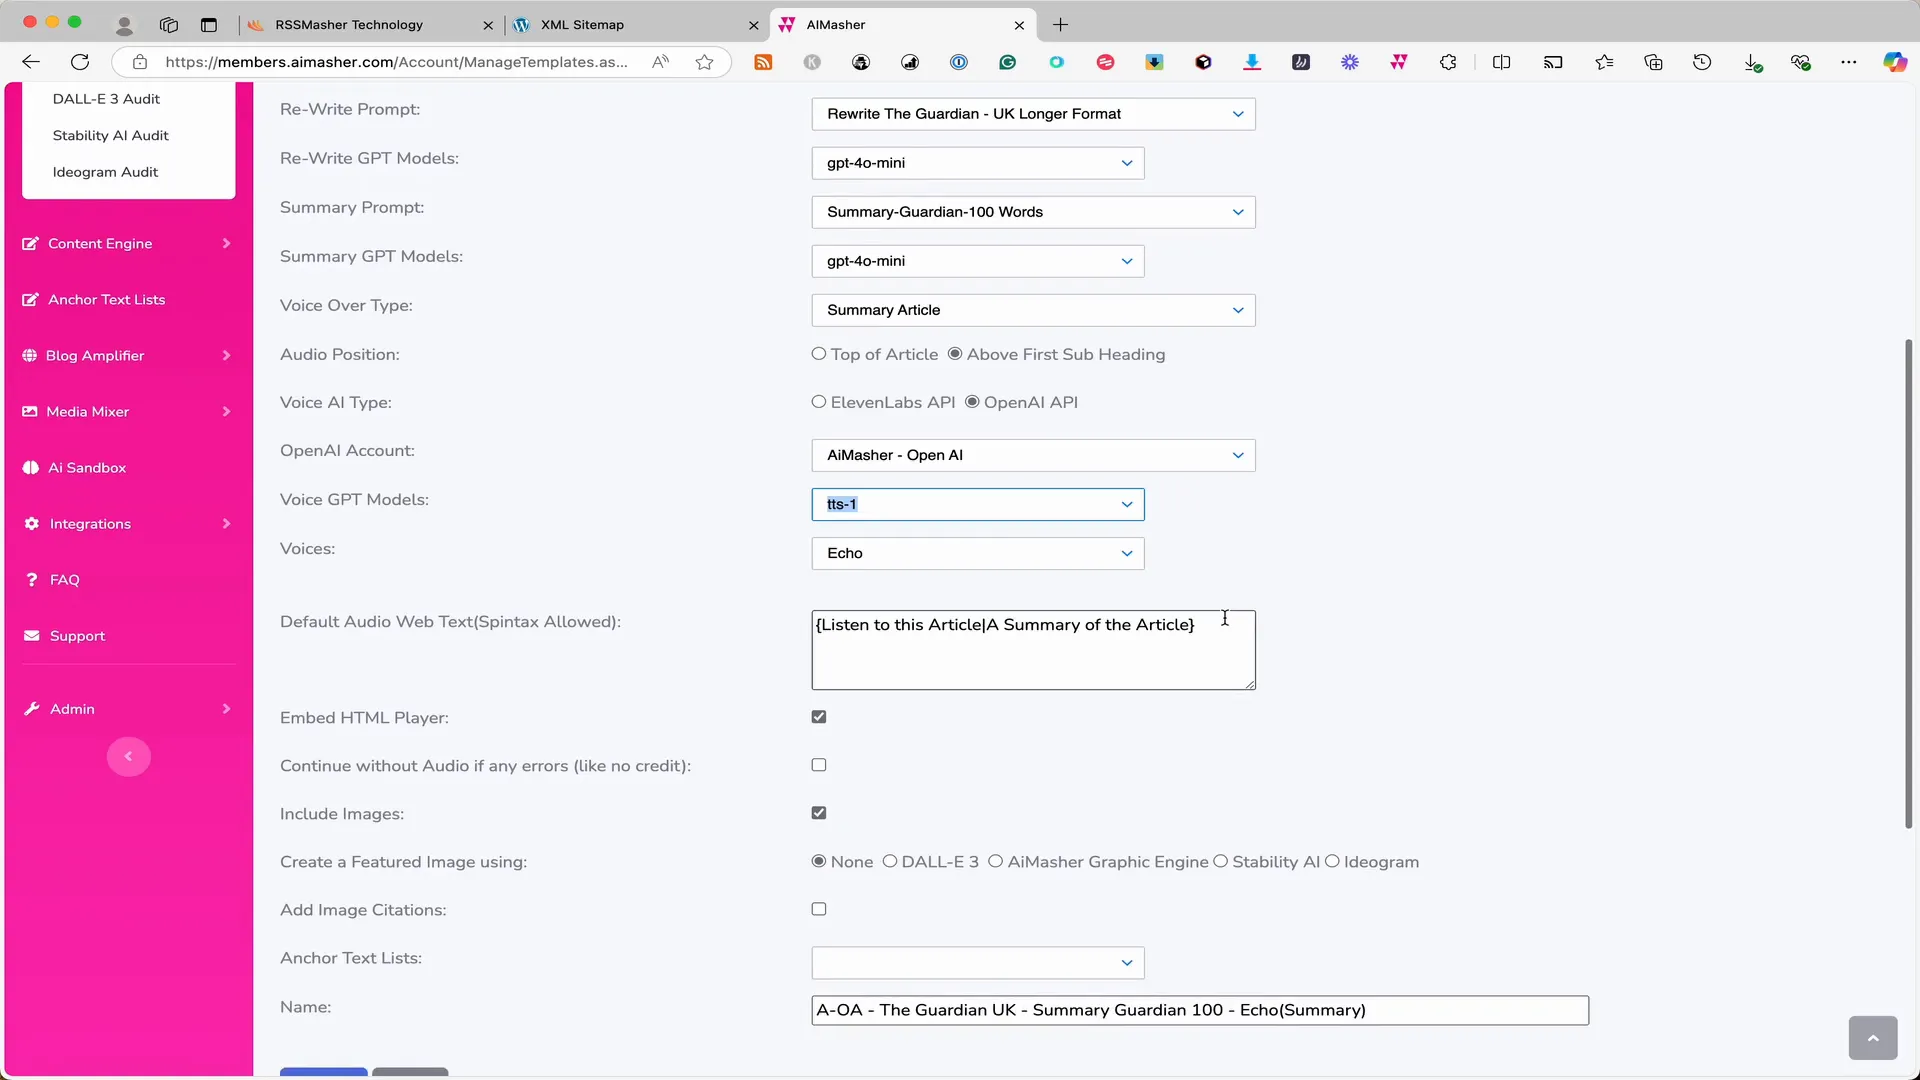
In the rewrite prompt options, you can choose various formats. For this example, let's use the Guardian UK longer format. Additionally, select the AI model you want to use for rewriting; GPT-4 Mini is a good choice. Once the articles are rewritten, you can also set up a summary prompt, which we will keep at 100 words.
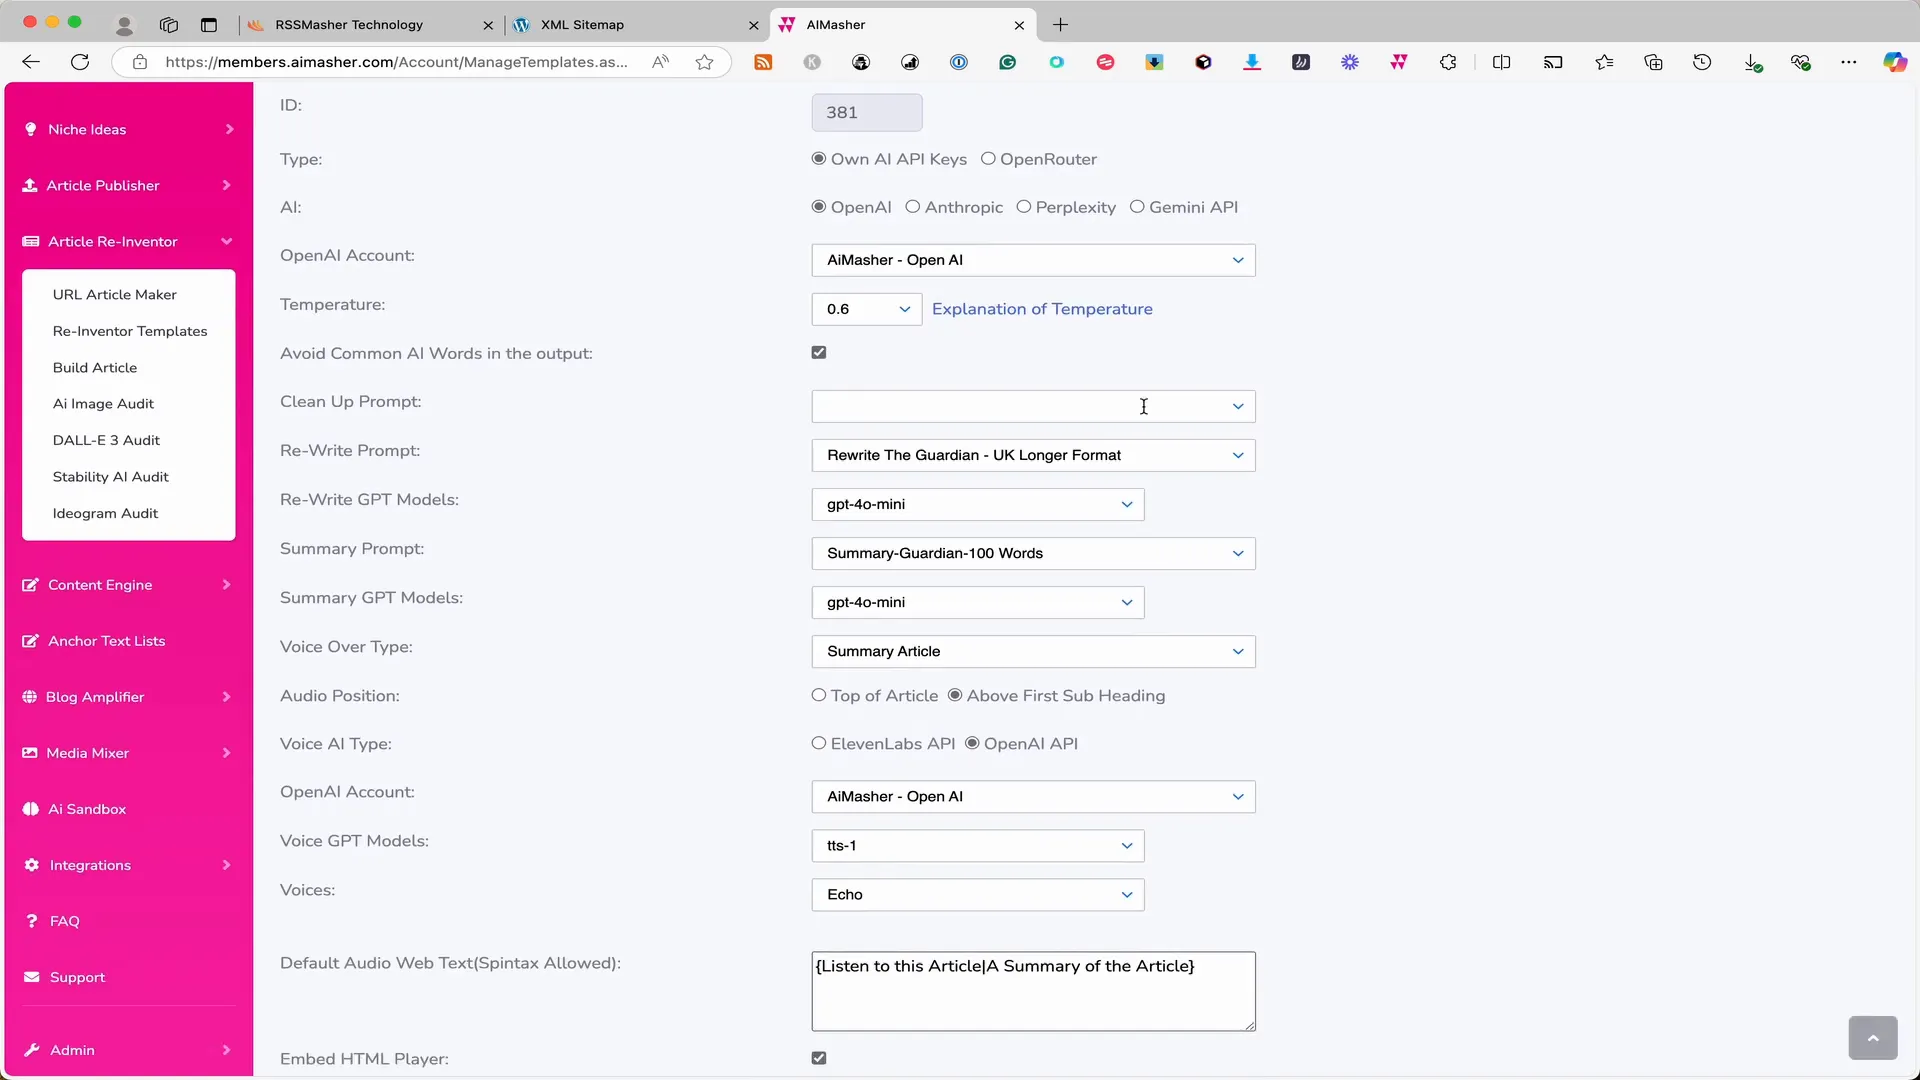
We will also want a voice-over for the summary article, positioning it above the first subheading. For this, utilize OpenAI's TTS model. You have the option to embed an HTML player and include images, but for this example, we won’t use AI to create any images. Once you’re satisfied with the template, click "Update" to save your changes.
Refreshing the RSS Masher Interface
After creating your new template, return to RSS Masher and select that template from the dropdown box. If you just created a new one, you may need to refresh the interface. This can be done by navigating to "Integrations" and selecting "AI Maser". Click on the "Get Reinvented Templates" button, which will retrieve all the latest templates you’ve created.
Once refreshed, go back to your mash and select the reinvented template you just created. Now, you need to decide what content you want to send to AI Masher. You can either scrape all or just the content. Since we already have the content, we will select the latter option.
Finalizing the Process
After sending the content to AI Masher, it will process it according to your template. It will rewrite the article, create a summary, and generate the voice-over before sending it back to you. The system will then automatically assign it to the schedule you set up earlier.
Because it recognizes that the content originated from WordPress, it will overwrite the original article rather than adding it as a new one. This effectively refreshes the content while keeping the same URL, prompting Google to revisit and reindex the article.
Creating a Schedule
Next, you’ll want to set up a schedule for posting. Create a new schedule and title it "Sitemap Rewrite Demo". Select the mash you created earlier and set the posting times. You can choose a time window between 8 AM and 10 PM and set how frequently you want to post, such as every 60 minutes or even two hours if you’re rewriting multiple articles.
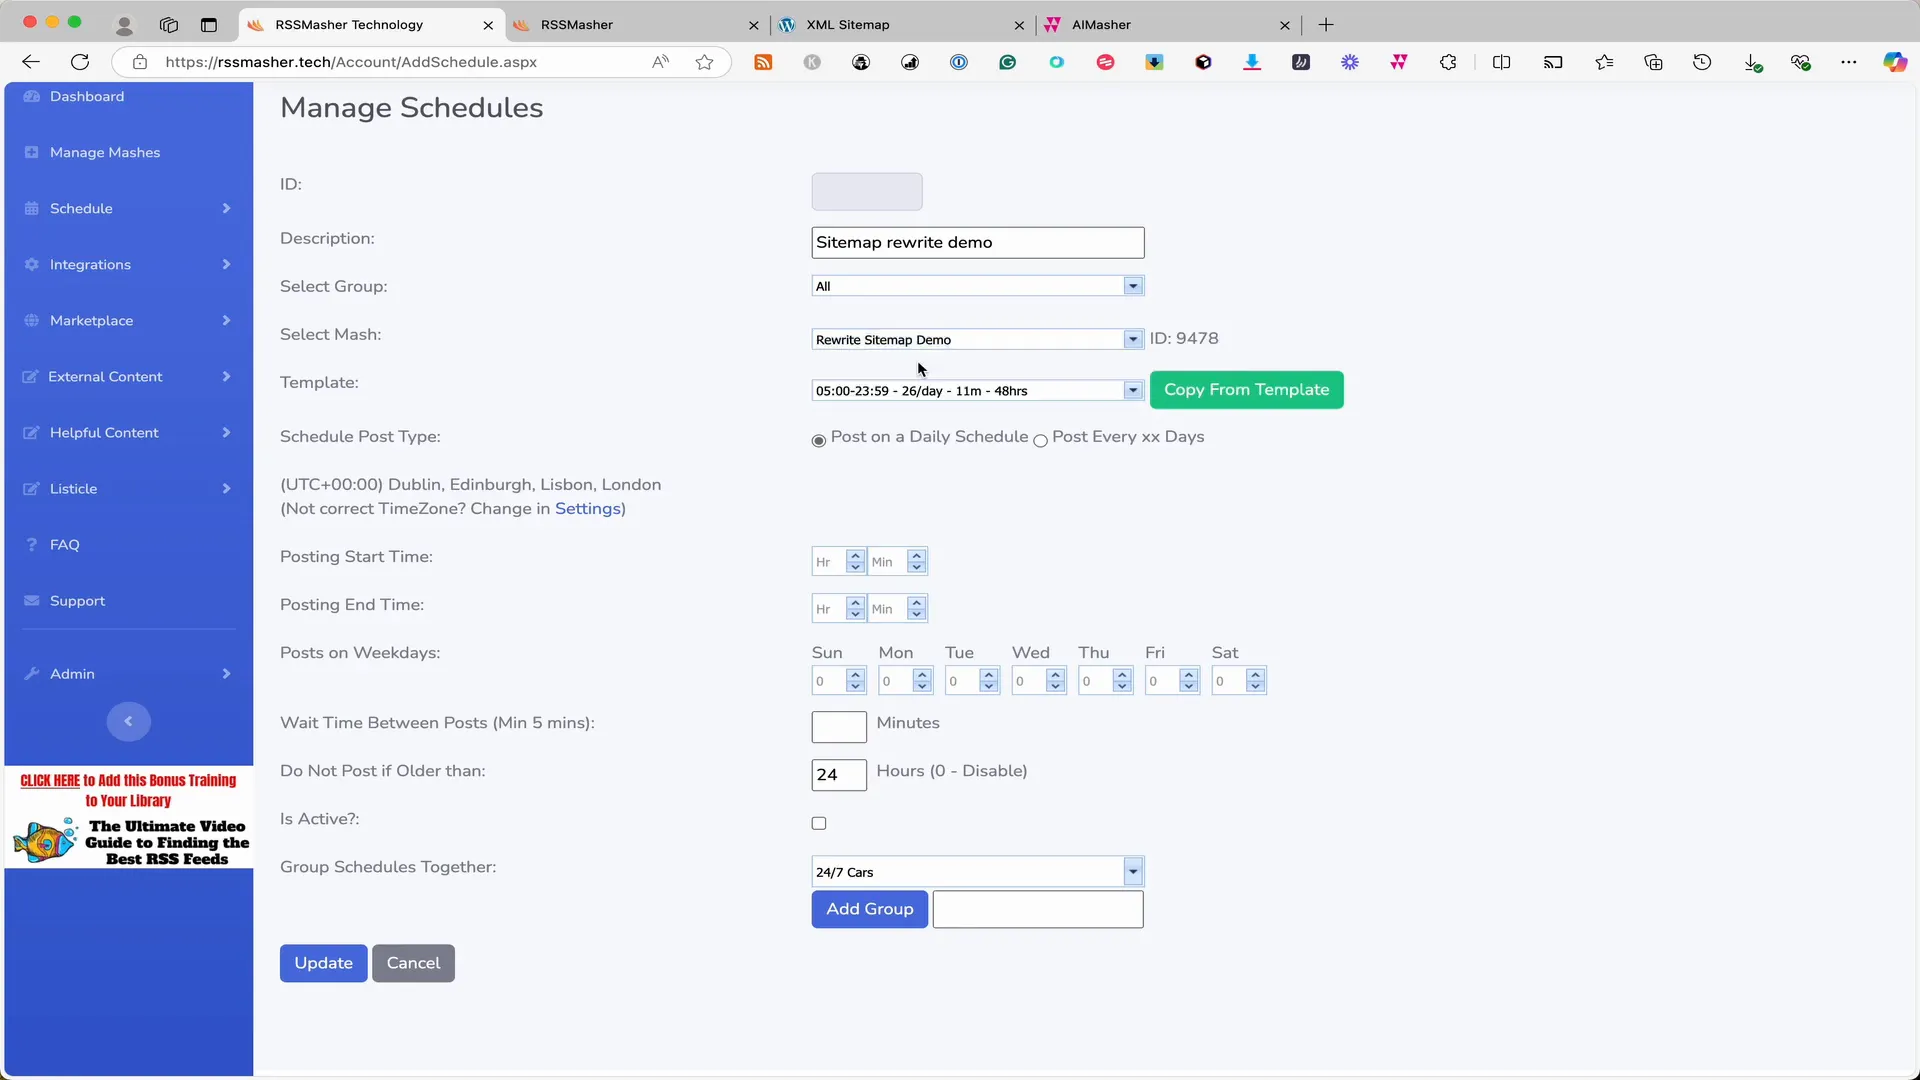
You can also add the WordPress site from which you took the sitemap. Options include using the first image as a featured image, uploading all images, and deciding whether to exclude the first image from the post to prevent duplication.
Monitoring Your Posts
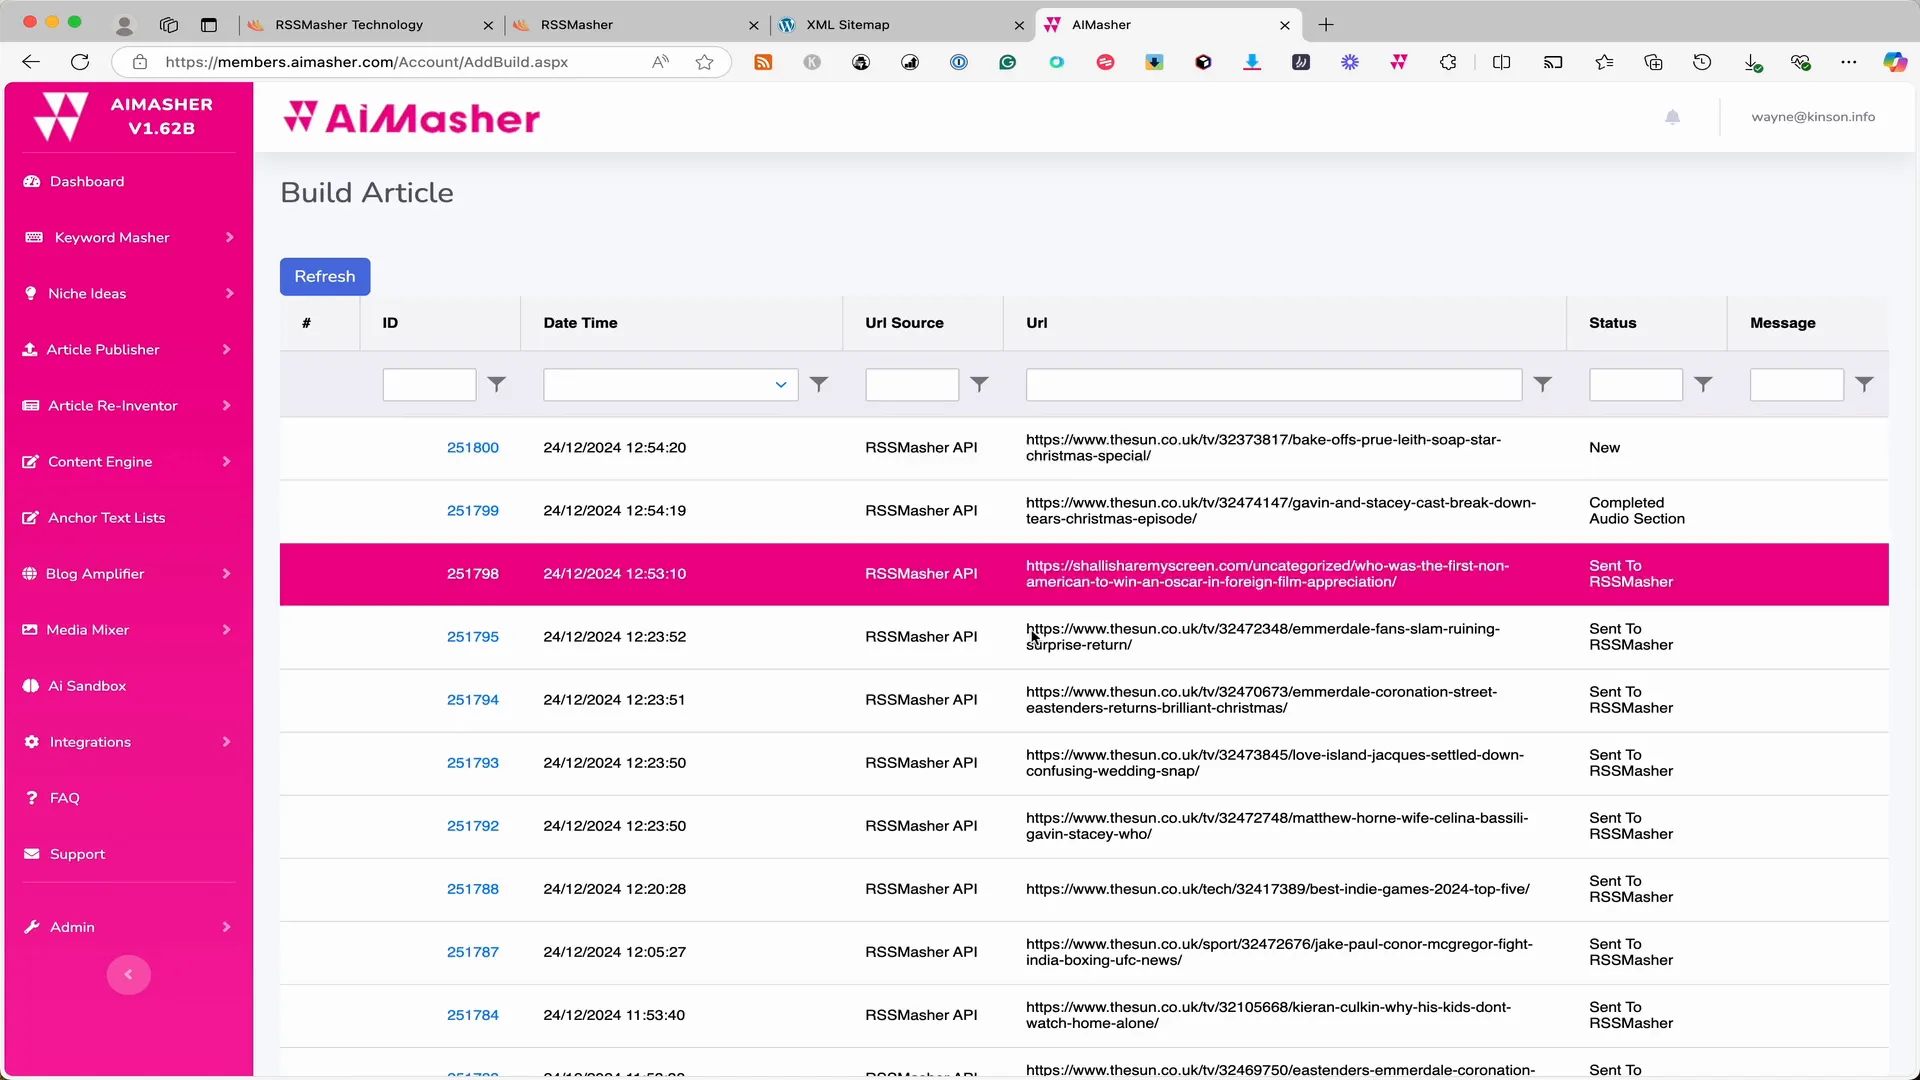
After everything is set up, you can monitor your posts in the "Collected Data" section of RSS Masher. You can filter to find the specific mash you’re working with and check its status. Once completed, the system will send the rewritten article back to your WordPress site, refreshing your content.
After a short wait, you’ll see that the system has detected the new article and is preparing it for posting. It will recognize what it was and drop it into the post grid, ready for your WordPress system to pick it up and publish.
Conclusion
Once the article is posted, you can view the rewritten version on your WordPress site. The original content has been transformed, making it more engaging and relevant. This new feature in RSS Masher allows you to breathe new life into your older posts efficiently.
This is a fantastic way to ensure your content remains fresh and that it continues to attract traffic. As we wrap up, I hope you find this new feature useful. Enjoy using RSS Masher, and happy rewriting!


